Frustrated because you can't delete a section break in Word? As a managed IT services provider with a lot of experience helping people who work at companies, we know how tough these problems can be. This guide offers a straightforward approach to efficiently eliminate these breaks, ensuring your document retains its intended structure.
Preparing to Delete Section Breaks
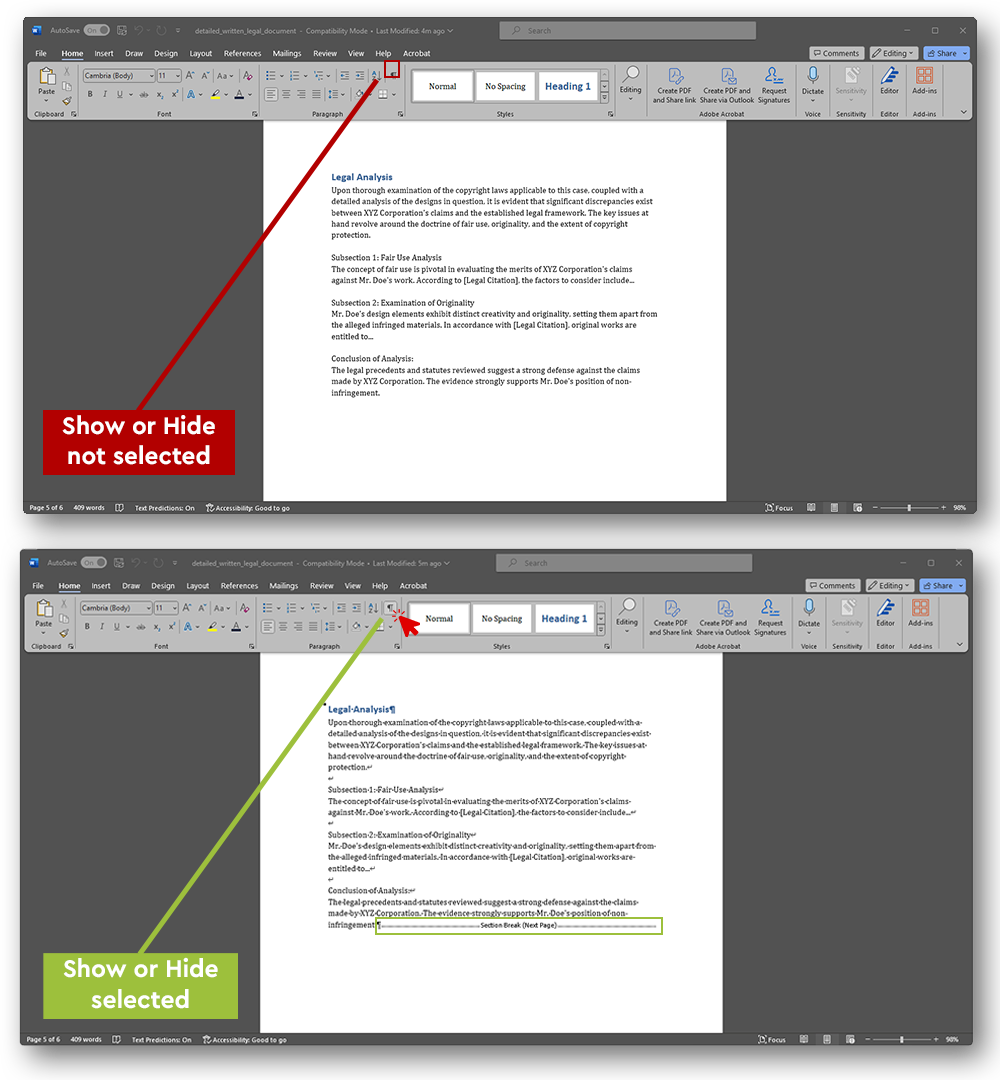
Before proceeding with the deletion process, ensure your Word document is open and you've pinpointed the section breaks you aim to remove. Activating the "Show/Hide ¶" feature under the Home tab will reveal these and other non-printing characters, making them easier to identify.
Step-by-Step Guide for How to Remove Section Breaks in Word
Please follow this step-by-step guide to resolve this common but challenging issue.
Step 1: Identify Section Breaks to Delete
First, locate the section break within your document that needs to be removed. This initial step is crucial for the subsequent deletion process.
Step 2: Use Shift and Arrow Keys to Select and Delete Section Breaks
- Place your cursor directly before or after the section break.
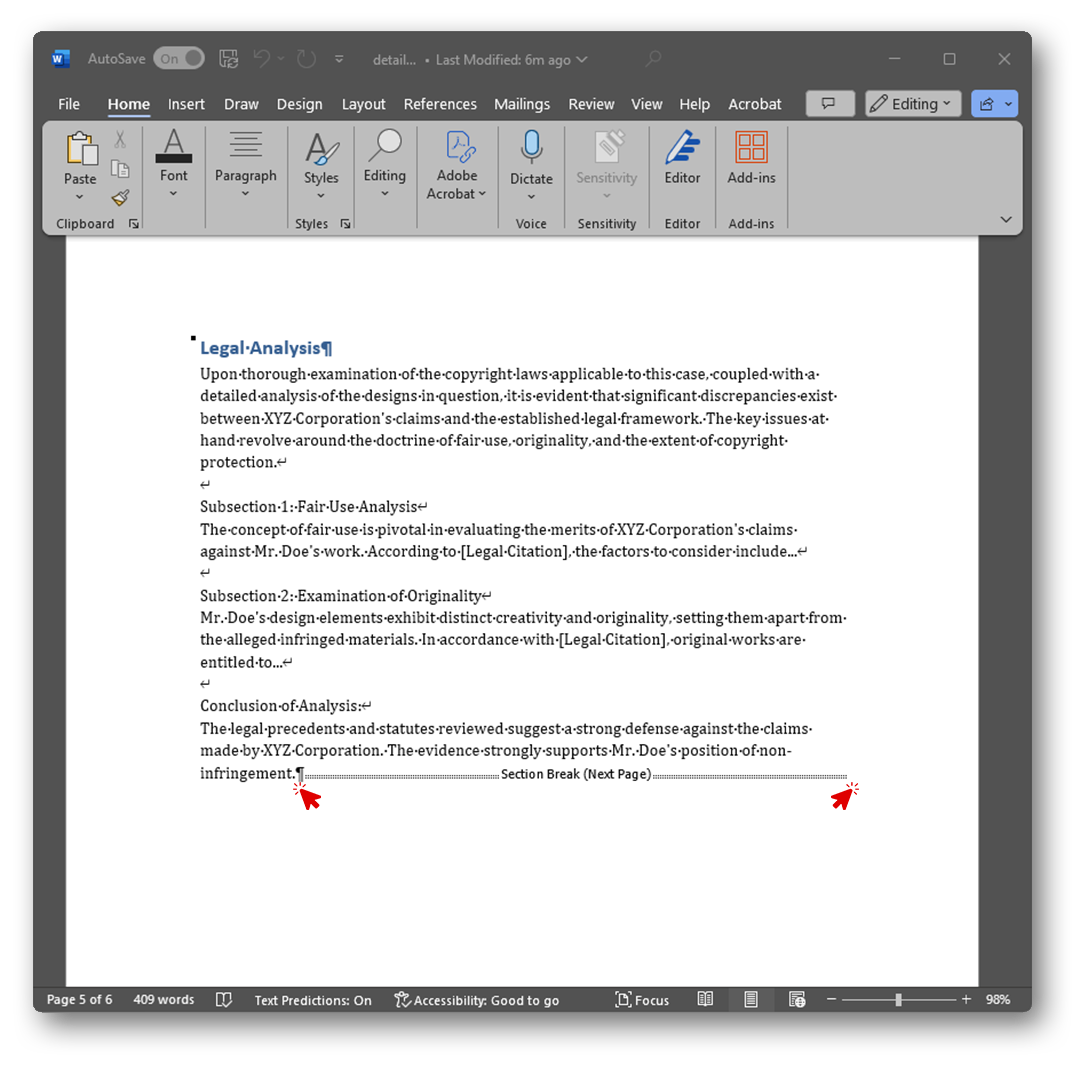
- Press Shift along with the left/right arrow key to select the break.
![]()
- With the section break selected, press the Delete/Backspace key to remove it from your document.

Method 2: Click in the Left Margin to Delete a Section Break
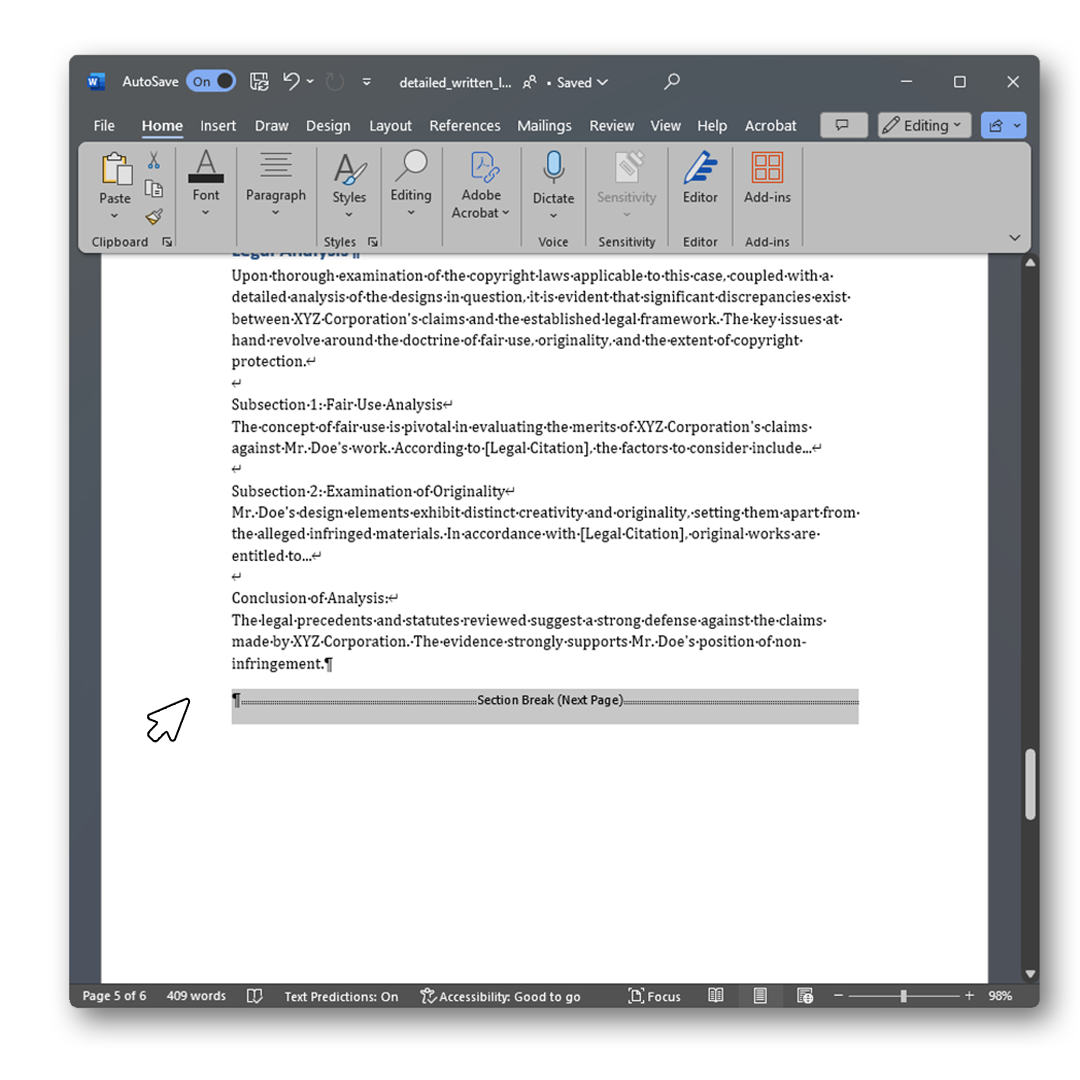
- Hover your cursor over the left margin next to the section break and click. The cursor should change to a different icon (usually a right-pointing arrow).
- Hit the Delete key to eliminate the selected section break.
Adopting these methods will enable you to remove section breaks from your Word document effortlessly, maintaining the desired layout and formatting.

Retain this guide for future reference whenever you need to clean up your document and eliminate unwanted section breaks. Should you encounter difficulties or require additional information, don't hesitate to reach out to your IT team for support. For individuals in search of extensive Managed IT Services, our team is prepared to offer professional help. Contact us!
You must be logged in to post a comment.