The Ultimate Guide to IT Procurement in 2025
If you’re sourcing new hardware, investing in software solutions, or managing complex vendor contracts, a robust IT procurement strategy can help your organization stay agile, secure, and competitive. As a managed IT service provider, we’ve seen firsthand the transformative impact of strategic technology purchasing—and we’re here to share the best practices that will help you make the most of your IT investments.
What Is IT Procurement?
IT procurement refers to the structured set of processes and activities involved in identifying, sourcing, acquiring, and implementing technology-related products and services in alignment with an organization’s strategic goals.
- Laptops
- Network Equipment
- SaaS Subscriptions
- Enterprise Software Licenses.
IT procurement goes beyond just transactional buying. The goal is for every technology investment to align with business objectives to optimize costs, protect data, and streamline operations.
Why IT Procurement Matters
-
Cost Savings and ROI
Effective IT procurement processes can significantly reduce wasteful spending and secure better deals through bulk buying, vendor negotiations, and proactive asset management. Each purchase will directly impact the bottom line.
-
Risk Management
Poorly vetted technology investments can introduce shadow IT, security vulnerabilities, and compliance issues. Having a formal procurement process minimizes these risks by ensuring every IT tool undergoes thorough vetting and due diligence.
-
Operational Efficiency
A structured approach to procurement in IT fosters smoother onboarding, reduces the chance of redundant tools, and facilitates better integration with existing systems. This will, of course, ultimately boost productivity and collaboration.
-
Vendor Relationships
Strong vendor management is crucial to securing favorable terms, service-level agreements (SLAs), and long-term partnerships that drive reliability and innovation.
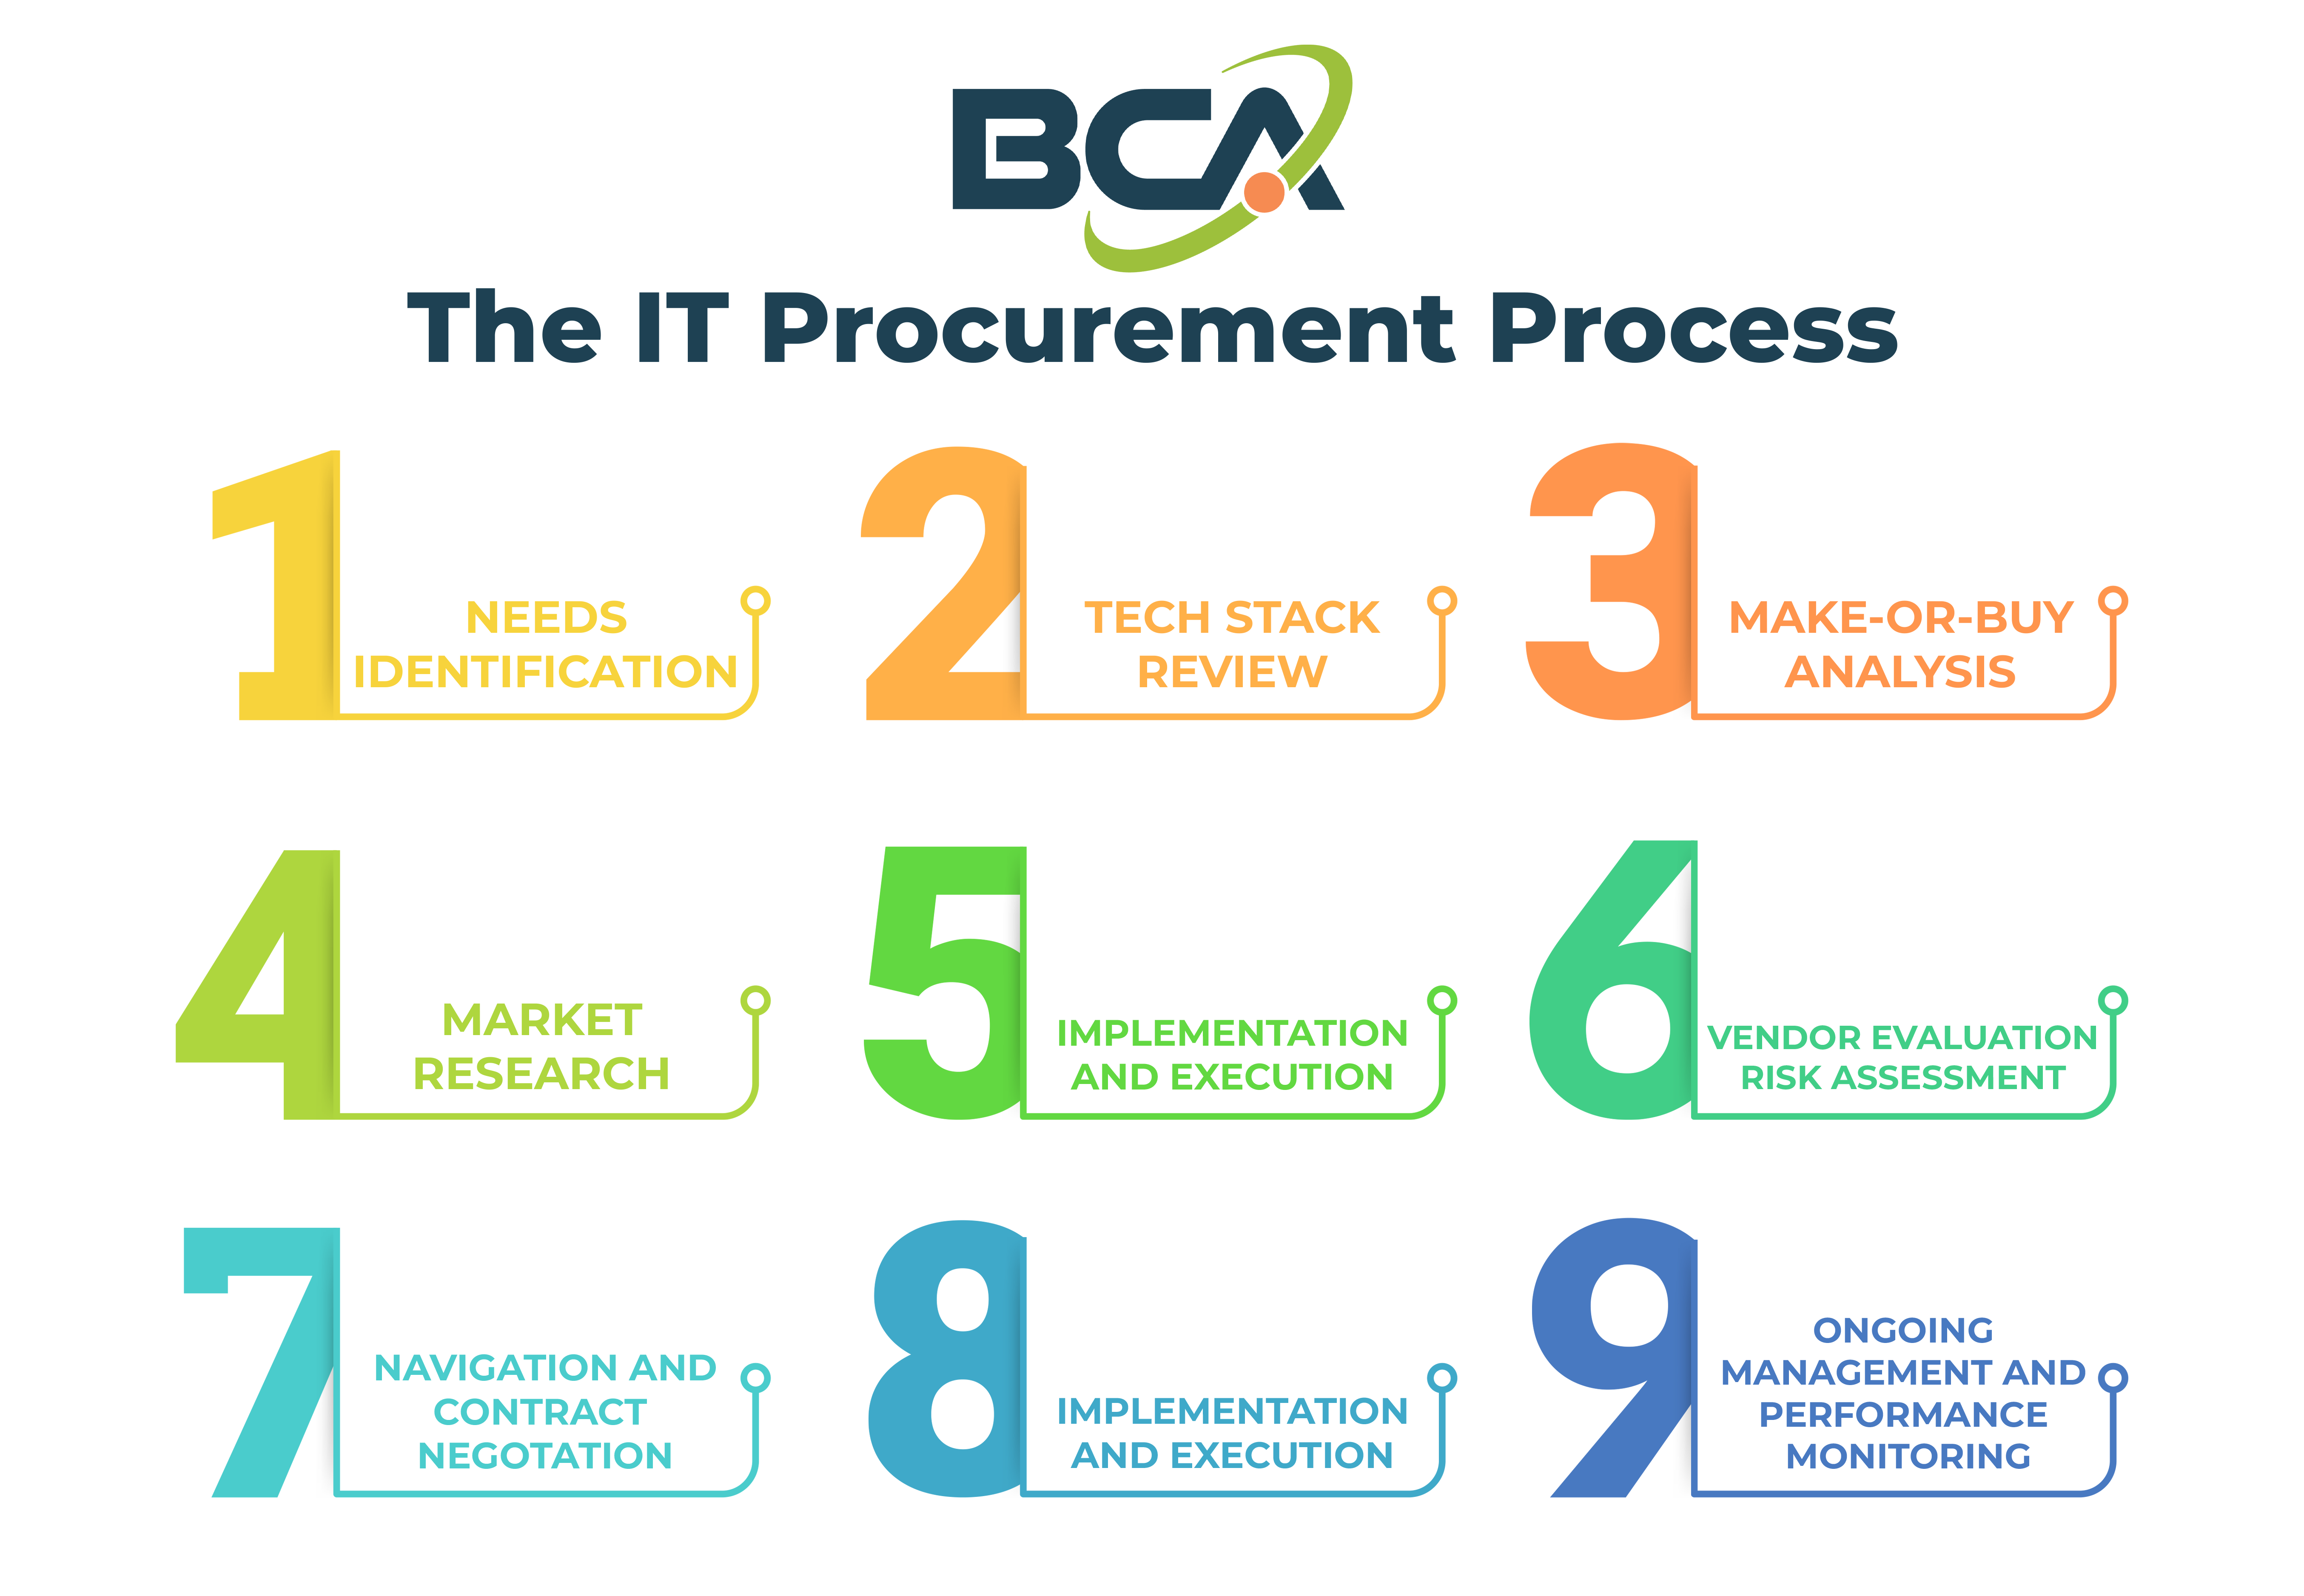
The IT Procurement Process: 9 Key Steps
Below is a comprehensive IT procurement workflow that brings together insights from multiple industry-leading approaches. While every organization may customize these steps to fit unique requirements, this framework offers a solid blueprint:
-
Needs Identification
Start by gathering input from stakeholders and end users to understand the exact technology requirements. Ask questions like:
- What business challenges or opportunities will this purchase address?
- Which features or integrations are non-negotiable?
- How will this solution fit into our existing tech stack?
Clearly defining objectives early on helps to align procurement activities with both operational and strategic needs.
-
Tech Stack Review
Before signing on with a new vendor, review your current inventory of software, hardware, and services. This step helps you avoid paying for redundant solutions.
-
Make-or-Buy Analysis
Determine whether building a custom solution in-house (make) or purchasing a ready-made system (buy) is the best path forward. Factors to consider include:
- Development cost and timeframes
- Internal skill sets and resource constraints
- Long-term scalability and maintenance
Most small to mid-sized organizations find that buying a proven solution saves time, lowers overall cost, and provides faster ROI.
| Factor | Make (In-House Development) | Buy (Vendor Solution) |
|---|---|---|
| Cost |
|
|
| Development Time |
|
|
| Scalability |
|
|
| Resource Needs |
|
|
-
Market Research
If you opt to buy, compile a list of potential vendors or platforms that meet your requirements. Collect key details such as pricing models, feature sets, and integration capabilities. This early research will guide you in creating a shortlist of feasible options.
-
RFP or Bidding Process
Issue Requests for Proposal (RFP) or initiate a bidding process to gather detailed information on pricing, service-level agreements, and vendor credentials. An RFP provides structure by defining your project scope, requirements, and timelines upfront, helping vendors propose more accurate and competitive bids.
-
Vendor Evaluation and Risk Assessment
Vet your shortlisted vendors for financial stability, security standards, and compliance with industry regulations. Pay close attention to cybersecurity certifications, integration support, and references from existing clients. A thorough risk analysis helps avoid pitfalls like data breaches and vendor lock-in.
-
Negotiation and Contract Approval
Enter into negotiations to secure the most favorable terms. It’s not just about price—discuss support packages, scalability, maintenance windows, and training. Once both parties agree, finalize the contract to set clear expectations on deliverables, payment schedules, and service-level metrics.
-
Implementation and Execution
With contracts in place, coordinate delivery timelines, installation tasks, and training sessions. Implement robust project management to monitor milestones, address hiccups, and ensure user adoption. If you’re deploying physical hardware, verify that each item meets the required specifications and security protocols.
-
Ongoing Management and Performance Monitoring
After rolling out the new IT solution, measure its performance against pre-defined KPIs such as uptime, user satisfaction, and cost savings. This feedback loop ensures that you can optimize usage, adjust configurations, and plan for upgrades or renewals proactively. Continuously auditing your IT assets helps maintain transparency, reduce redundancies, and improve cost efficiency.
Common Challenges in IT Procurement
- Shadow IT: When employees purchase software without IT’s knowledge, it can lead to security risks, hidden costs, and data silos.
- Budget Constraints: Balancing the initial capital outlay, recurring costs, and potential hidden expenses (like maintenance and training) can be tricky.
- Integration Complexities: New tools must coexist with existing systems. Fragmented solutions can erode productivity and cause inefficiencies.
- Managing Vendor Relationships: Handling multiple vendors across different geographies requires clear SLAs, communication protocols, and dispute resolution mechanisms.
IT Procurement Best Practices
-
- Clearly Define Requirements: Collaborate with various departments (e.g., IT, finance, HR) to identify must-have features and align technology choices with organizational objectives.
- Prioritize Security and Compliance: Insist on vendor certifications and robust security protocols to safeguard data and ensure regulatory compliance.
- Evaluate Total Cost of Ownership (TCO): Account for upfront costs, training, upgrades, and potential retirement costs of hardware or software.
- Leverage Data Analytics: Use analytics to track utilization, measure ROI, and forecast future tech needs.
- Foster Cross-Functional Collaboration: By involving various teams in the selection and approval phases, you create a more holistic procurement strategy that meets everyone’s needs.
| Department | Key Responsibilities in Procurement |
|---|---|
| IT |
|
| Finance |
|
| HR |
|
| Collaboration | All teams converge to streamline decision-making, ensure strategic alignment, and facilitate efficient resource usage across the organization. |
How Managed IT Services Streamline Procurement
As a managed IT service provider, we understand that procurement doesn’t stop at the purchase. We help you:
-
Assess Needs
We collaborate with business leaders to map out your tech roadmap, ensuring each purchase aligns with strategic goals.
-
Identify Reliable Vendors
Our established vendor relationships and industry insight help you secure high-quality products at competitive rates.
-
Implement and Integrate Solutions
We handle the entire deployment process, from shipping hardware to configuring software, ensuring minimal disruption.
-
Provide Ongoing Support
After implementation, we offer continuous monitoring, maintenance, and help-desk services to optimize performance and prevent downtime.
An optimized IT procurement process is essential in helping organizations maintain a competitive edge, enhance operational efficiency, and manage costs. By carefully mapping out each stage—from needs identification through ongoing vendor management—you’ll create a more agile, secure, and future-ready IT environment.
If you’re looking to make your IT procurement strategy more efficient and cost-effective, our team of experts is here to guide you. Contact us today to learn how our managed IT services can streamline your procurement process and maximize the return on your technology investments.